Install and configure Smart IoT Switch Box to an existing system
Smart IoT Box installing is a very easy and painless process. Here is a small steps defined how to setup it.
Instrument Required:
- * Screw driver
- * Wire cutters
- * One medium size screw to hang the device on wall if you want
- * Electrical tape (may be required)
Note:
- > If you are not aware or confidence in electrical switch board connection, please don't do anything by yourself. Contact an electric technician.
- > If you are aware, before doing anything in the existing electrical switch box, must turn off the main power supply. Don't do anything while it is ON.
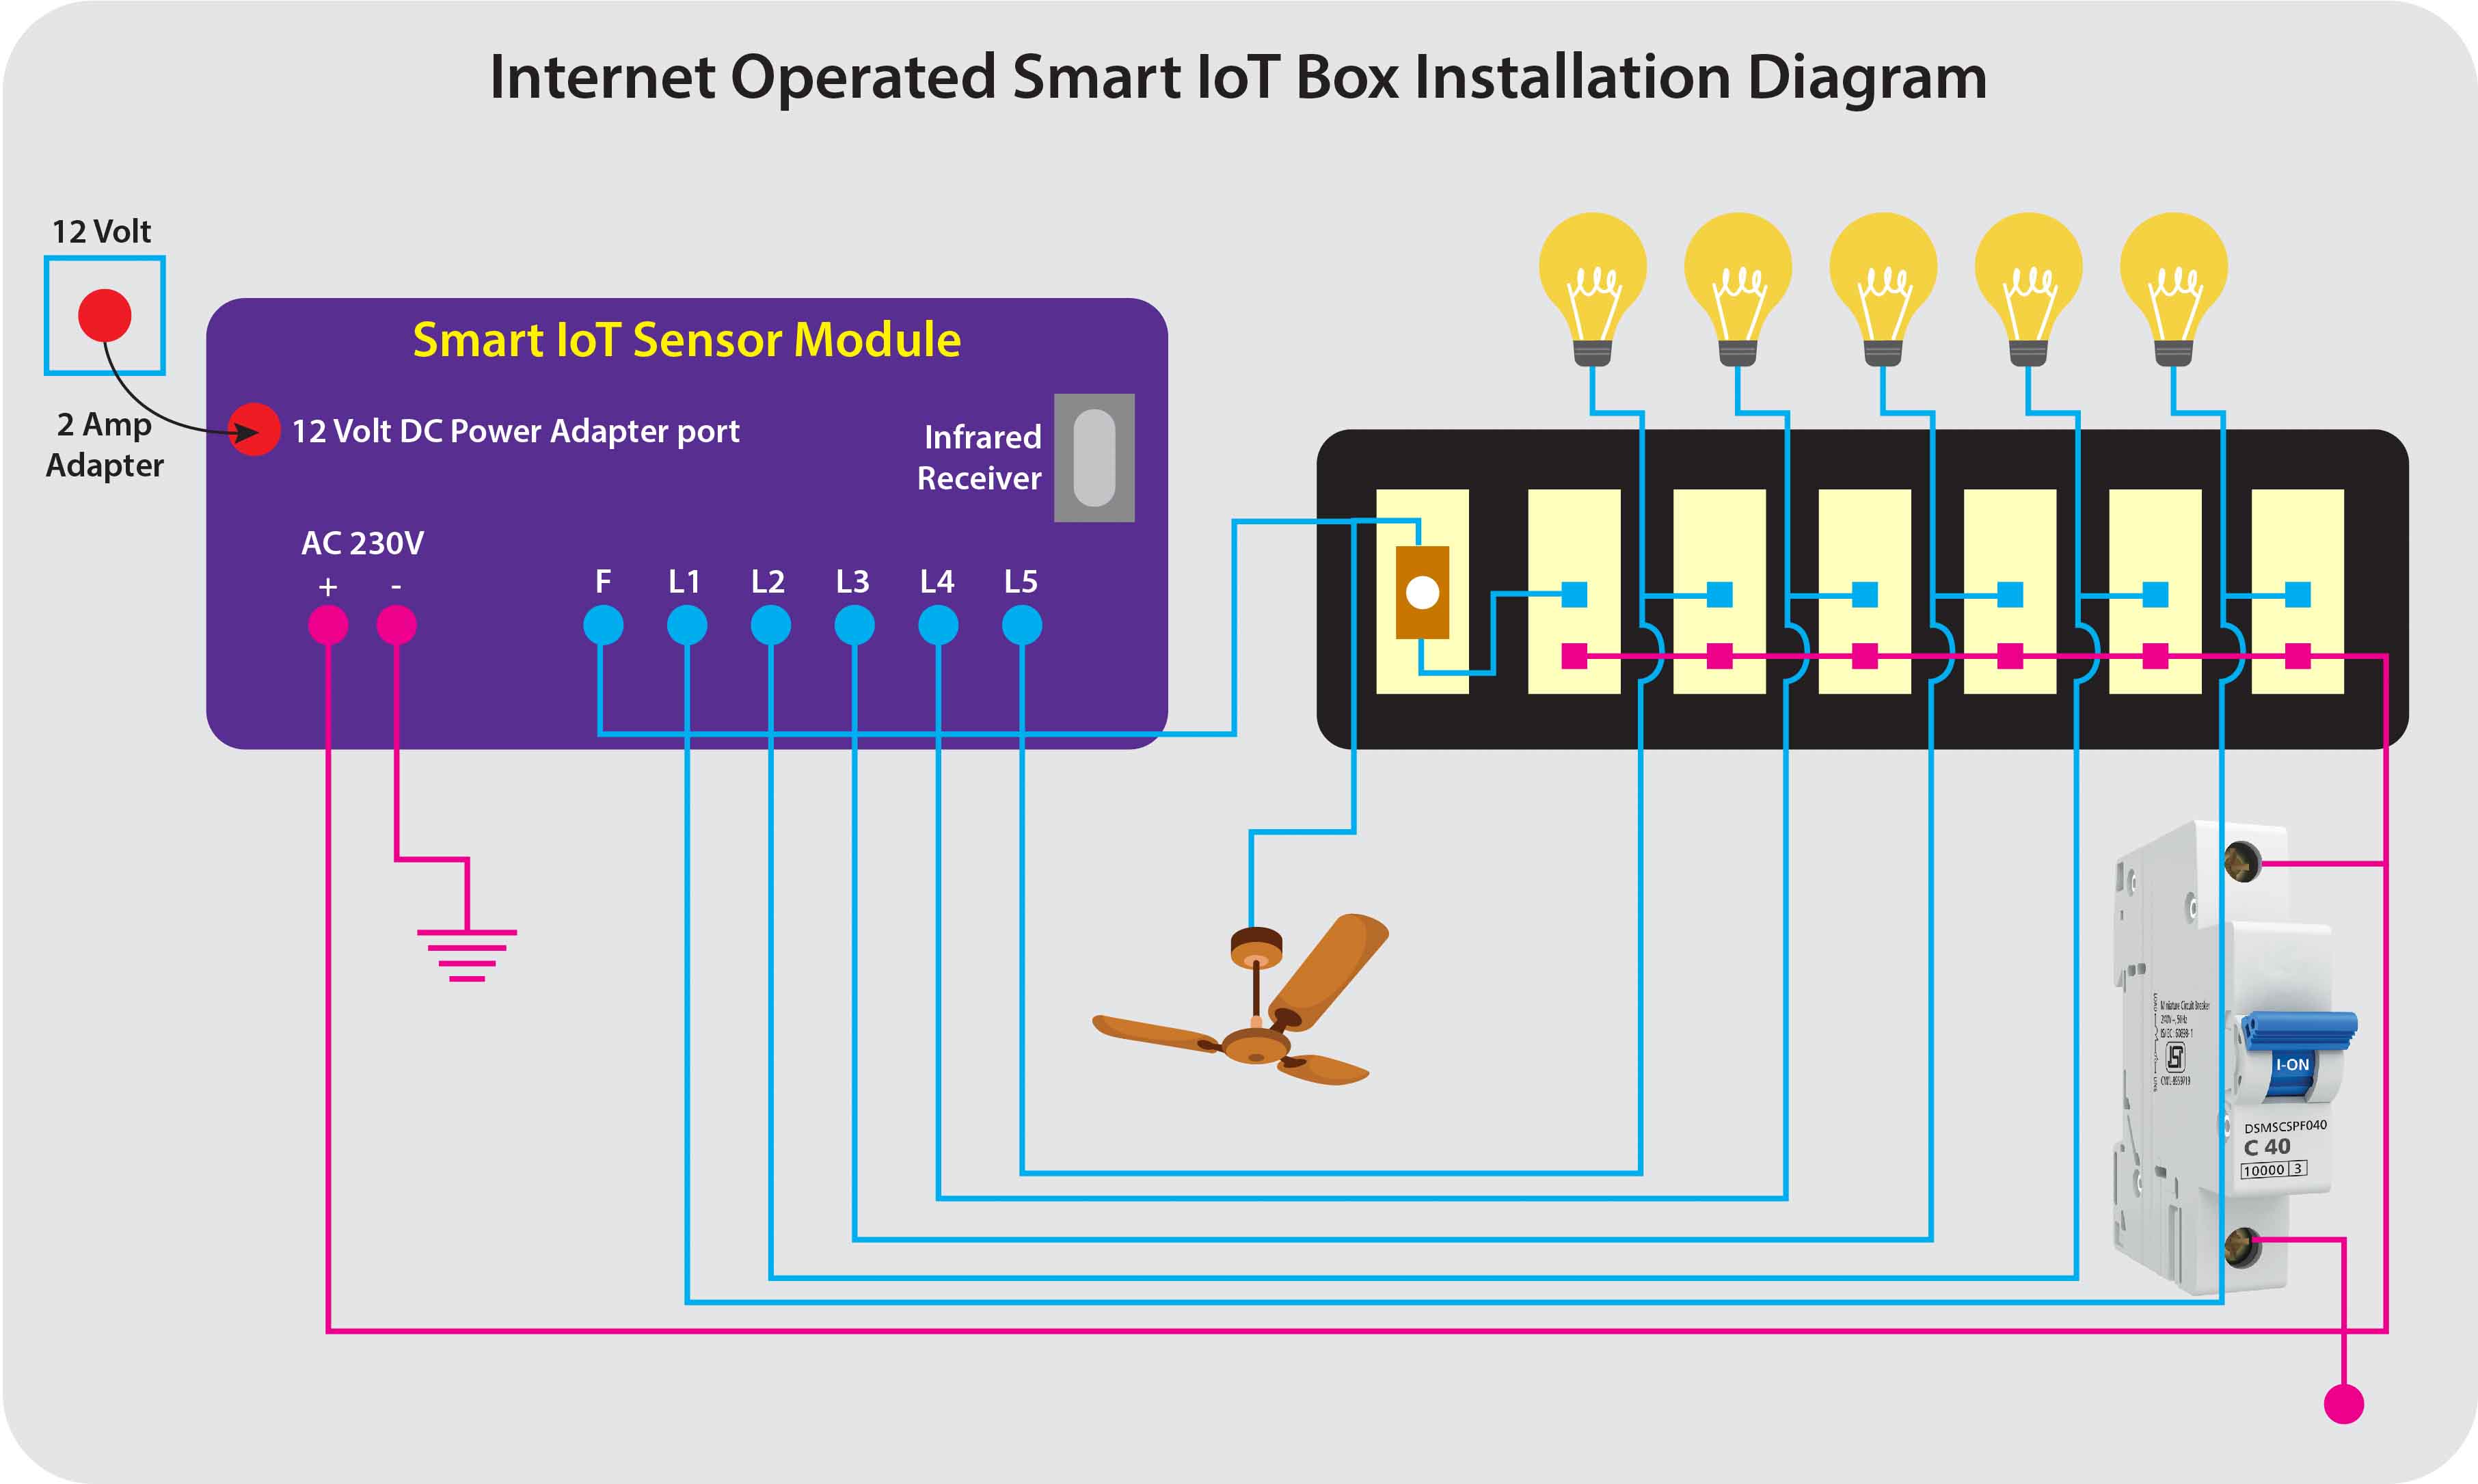
Step 1: Find the main power supply wire i.e. phase wire and neutral wire in the board.
Step 2: You find in the smart IoT box, there have six separate wires for controlling six different lights, and one main phase wire which needs for input power supply.
Step 3: For further connection details, please refer the above figure which will clearly shows you how to setup the different wires in different switches.
Download app from google Play store
How to use the app
For your references, some snap shots of the app are available in play store.
First of all you need to download the app from google play store.
- 1. Then you need to contact the admin to register your smart box and your android set in server
- 2. When your registration in server will successful, you will login to the system by the app
- 3. Select your one of the register devices from menu
- 4. Change your light switch from ON to OFF or vice versa
- 5. Click on SAVE button
- 6. Timer option available beside the light switch. You may apply activation or deactivation timer to individual lights